

When you are planning to buy or installing an SSD there are 6 important steps that must be done to ensure that it will work smoothly and get the maximum speed it works differently than a normal hard disk drive (HDD) and there are several tips to get the best performance so let’s start and enjoy the article
This article was updated on 16 Dec 2022
1. What is an SSD?
An SSD, or Solid State Drive, is a type of storage device that store data. Unlike a traditional hard drive, it has no moving parts, it’s easy to install which makes it more durable, faster, and quieter. they are commonly used in computers and other electronic devices to store the operating system, programs, and user data. They are becoming increasingly popular because of their many benefits over traditional drives, such as faster access times, lower power consumption, and greater resistance to shock and vibration I think its the time to remove the old hard drive and install a new SSD.
2. What types of SSD?

There are many types of SSD drives these are the most commonly used and are as follows:
2.1 SATA SSD
These are the most common type of SSD drive and are often used as a replacement for traditional hard disk drives (HHD) in laptops and desktop computers. They use the SATA interface to connect to the motherboard and are available in a range of capacities.
2.2 NVMe SSD
These SSDs use the Non-Volatile Memory Express (NVMe) protocol, which allows for faster data transfer speeds than SATA SSDs. They are often used in high-performance applications, such as gaming and video editing.
2.3 M.2 SSD
This SSD is similar to NVMe SSDs, but they use the M.2 form factor, which is a small, rectangular card that can be plugged into a motherboard or expansion card. M.2 SSDs are often used in laptop and small form factor desktop computers.
2.4 External SSD
These SSDs are portable and can be connected to a computer via a USB cable interface. They are often used to store and transfer large amounts of data, such as photos and videos.
2.5 Embedded SSD
These SSDs are integrated into devices such as routers and security cameras. They are often used to store data locally and are not typically accessible by the user.
3. How to install an SSD?
Installing an SSD is a relatively straightforward process that can help improve the performance of your computer. Here are the steps you can follow to install an SSD:
- Back up your data: Before you start the installation process, it’s important to make sure that you have a backup of all your important data. This is because the installation process involves formatting the drive, which will erase all the data on it.
- Shut down your computer: Once you have backed up your data, shut down your computer and unplug it from the power outlet.
- Remove the case: In order to access the inside of your computer, you’ll need to remove the case. This will typically involve removing a few screws and then sliding the case off.
- Locate the drive bay: Inside your computer, you should see a drive bay where you can install the SSD. The drive bay is typically located near the front of the case and is slightly larger than the SSD.

- Remove the current drive: If you are replacing an existing drive, you’ll need to remove it from the drive bay. This will typically involve removing a few screws that hold the drive in place.
- Install the SSD: Once you have removed the current drive, you can insert the SSD in its place. This will typically be mounting the SSD into the drive bay and securing it with the screws you removed earlier.
- Connecting the power and data cables: Once the SSD is installed, you’ll need to connect the power and data cables. The power plug is typically a 4-pin connector that goes into the back of the drive, while the data cable is a thin ribbon cable that goes into the motherboard.
- Boot from the SSD: Once you have connected the cables, you can close the case and turn on your computer. If everything is working correctly, your computer should boot from the SSD. If it doesn’t, you may need to enter the BIOS and change the boot order to prioritize the SSD.
- Install the operating system: If you are installing the SSD as a primary, you’ll need to install the operating system on it. To do this, you’ll need to boot from a bootable installation media and follow the prompts to install the operating system on the SSD.
so in order to get the maximum speed and reliability of SSD there are some steps these are the most important 6 steps
4. The 6 important steps must be done when installing an SSD
4.1 Check if the AHCI is activated from BIOS
The AHCI or Advanced Host Controller Interface is a mode in the Bios that affects the speed by 30% the simple idea is that this mode tells your pc that it is dealing with SSD or a newer hard drive, not an old HDD after turning on this you will notice that there are some improvements in performance and the speed
to access the bios settings on your pc. This is typically done by pressing a key (such as F2 or Del) during the boot process, before the operating system loads. Once you are in the BIOS, you will need to navigate to the appropriate menu, which may be labeled “Advanced,” or “Chipset,” in the SATA configuration this menu, you should look for an option related to AHCI and ensure that it is enabled

4.2 Clone the Old hard disk To New SSD
If you have upgraded your system with a new SSD you need to transfer all your data from HDD to SSD and you think that it’s a difficult job but it’s so easy just by using a clone command to clone all your hard disk just a few clicks
This option also clones all your Windows files even your Windows and you don’t need to install the Windows again and install all the drivers again To clone your hard you can use one of this software: MiniTool Partition Wizard and EaseUS Todo backup
4.3 Install the SSD software provided by the manufacturer
SSD utility is a type of tool that is designed to help users manage and optimize the performance of their SSD. It is typically provided by the manufacturer of the SSD, and it offers a range of features that can help users get the most out of their drive. Some common features of SSD utility include the ability to monitor the health and status of the drive, update its firmware, and perform diagnostic tests to find errors and problems. By using this tool, users can ensure that their SSD is operating at its best and avoid potential issues that could affect its performance and longevity.
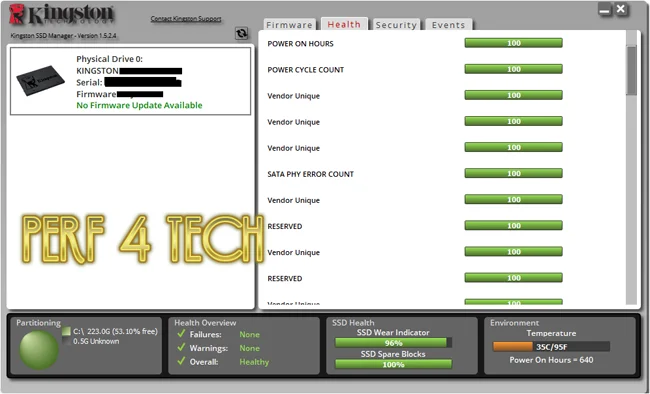
If you have any SSD drive from these brands Samsung, Crucial, Kingstone, or Sandisk you can select the program from the list below:
You probably don’t even need to download and install the software manually, it happens automatically after the operating system recognizes the SSD drives soon as it is connected to the motherboard.
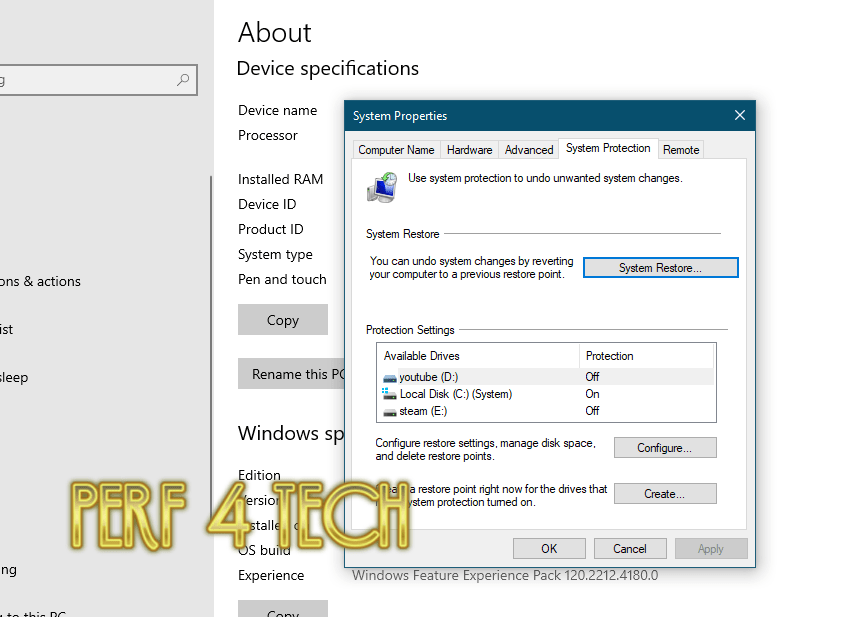
4.4 Activate the High-Performance Power Plan
It’s a setting on a computer that is designed to maximize its performance. This plan is typically available on computers running the Windows operating system, and it allows the computer to use more of its resources, such as the CPU and the graphics card, to improve its performance.

its typically used when the pc is performing resource-intensive tasks, such as gaming, video editing, or 3D rendering. By using this plan, the computer can deliver better performance and faster speeds when running these types of applications. However, it should be noted that using the High-Performance Plan can also lead to increased power consumption and shorter battery life on laptops and other portable devices.
To enable it on a Windows computer, you can go to the Control Panel and select Power Options. From there, you can choose the High-Performance Plan and apply the changes. You can also customize the settings of the power plan to fine-tune its performance and adjust it to your specific needs.
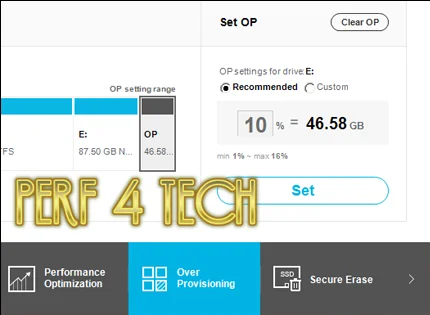
4.5 Select the OP feature to extend the life of the hard drive
The op feature is a specific model or version of the SSD drive that includes some sort and optimization When you have a small storage SSD there is a high chance that it will be filled with files after a few months of using the Provisioning feature reserves 7 to 10% of the total size of the drive, you must leave some free space otherwise the speed dropped dramatically now if you don’t store any files on your SSD avoid this step.
4.6 general guidelines to follow when using or installing an SSD
There are a few general guidelines to follow when using or installing an SSD to ensure optimal performance and longevity of the device. Here are a few things to keep in mind:
Avoid sudden power loss: SSDs are sensitive to sudden power loss, which can cause data corruption and other issues. It’s important to use a reliable power supply and battery backup and avoid unplugging the device or turning off the power abruptly.
Avoid overheating: Like any electronic device, SSDs can be damaged by overheating. Make sure the device has proper ventilation and avoid exposing it to excessive heat.
Avoid physical damage: SSDs are typically more durable than traditional hard drives, but they can still be damaged by physical impact. Handle the device carefully and avoid dropping it or subjecting it to other forms of physical stress.
Avoid excessive writes: SSDs have a limited number of write cycles, so it’s important to avoid constantly writing and rewriting large amounts of data. This can reduce the lifespan of the device and cause it to fail prematurely.
Avoid using outdated firmware: Keep the firmware on your SSD up to date to ensure optimal performance and avoid potential compatibility issues. Check the manufacturer’s website for updates and follow their instructions for installing them
Avoid messing up with Windows settings: some internet users say in order that your SSD to work properly there are some settings that must be done on Windows 10 as enabling trim and disabling auto defragment and disabling the SuperFetch, you must trust Windows when it comes to to SSD
Overall, it’s important to handle and use your SSD with care to ensure it performs well and lasts as long as possible. If you have any specific concerns or questions, you may want to contact the manufacturer of the device for more information.
5. Conclusion
there are some steps that must be done when you want to use SSD as your main storage you can apply these steps on your computer or laptop device these settings allow you to get the best performance of it getting the maximum speed you can control the SSD from special software that has been developed by the SSD manufacture this software allow you to control the op feature and more in general SSD can give you a great experience even when you are handling with old laptop or pc you SSD bring it back to life trust me it makes a huge difference
Finally, I hope my article added some valuable information to you. If you have some questions? Let me know in the comments below. Ill try my best to answer them.


