

How to partition flash drive? Partition USB flash drive seems exactly like partitioning the primary hard disk on a computer. Partitioning involves dividing the space into multiple sections, which can be useful for better organization of stored files. In this article we will know how we can partition our flash drive correctly so let’s start.

How to partition flash drive
To partition flash drives we have two methods:
- At first, you can accomplish the task without the need for additional programs, but you’ll need to empty the flash drive’s contents.
- In the second, no files on the flash drive will be deleted, but it requires the use of an external program.
1. Using the Disk Management tool in Windows
Windows includes Disk Management, a tool for efficiently managing connected storage on your computer. It allows actions like changing a drive letter, deleting a hard disk partition, and reallocating space. This tool works with all storage types, including SD cards and flash memory, making it reliable for partitioning flash drives. Keep in mind, though, that using this method will erase all flash drive contents and require converting the file system to NTFS. It’s a convenient choice for new flash drives or those avoiding external programs, as long as you can temporarily move files during the partitioning process.
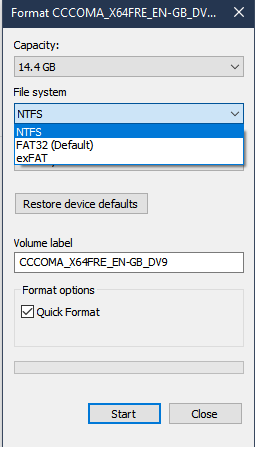
To begin, convert the flash drive to NTFS. This is a straightforward process but involves formatting the storage unit and erasing any saved files. To check the current file system, right-click the flash drive in File Explorer, select Properties, and look for the File system information. If it indicates FAT or FAT32, you’re about to convert it to NTFS.
Right-click on the flash drive partition, choose Format and select NTFS from the File system dropdown. Click Start, then OK, and wait for the Format complete message. Now, the flash drive is ready for partitioning.
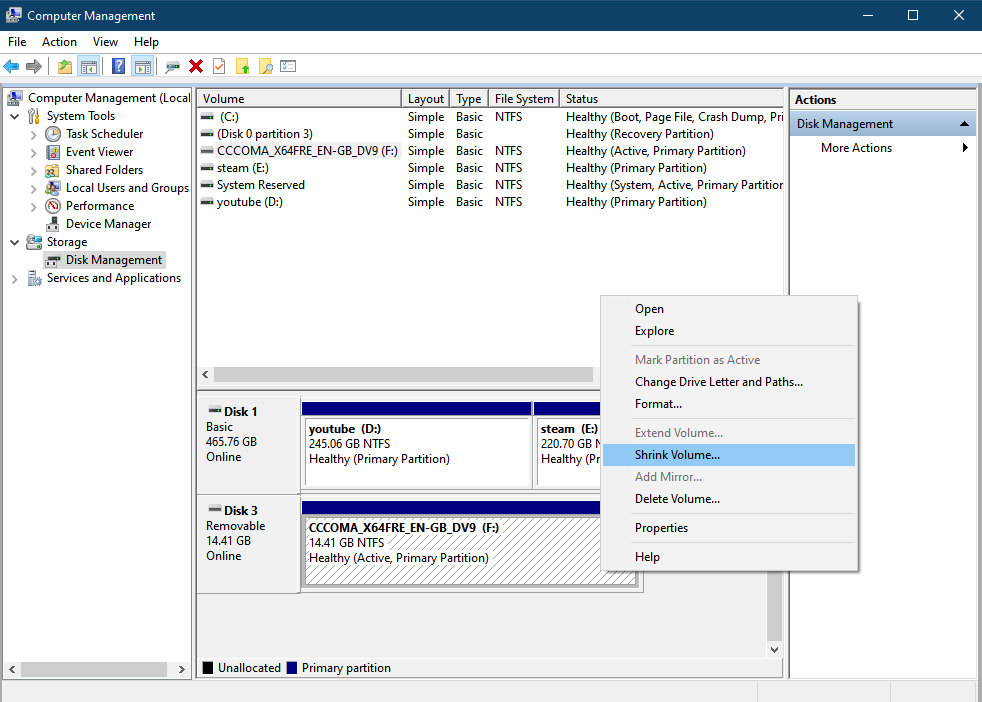
To initiate the flash drive partitioning process, launch the Disk Management tool in Windows. You can access it either from the menu that appears after pressing the Win + X keys simultaneously or by typing the command diskmgmt.msc in the Run window, triggered by pressing the Win + R keys together on the keyboard. Once the tool is open, right-click on the primary partition of the flash drive located at the bottom in Disk Management. From the context menu, select Shrink Volume. This option is responsible for partitioning the flash drive. Note that if the flash drive operates on the FAT or FAT32 system, you may not find this option available.
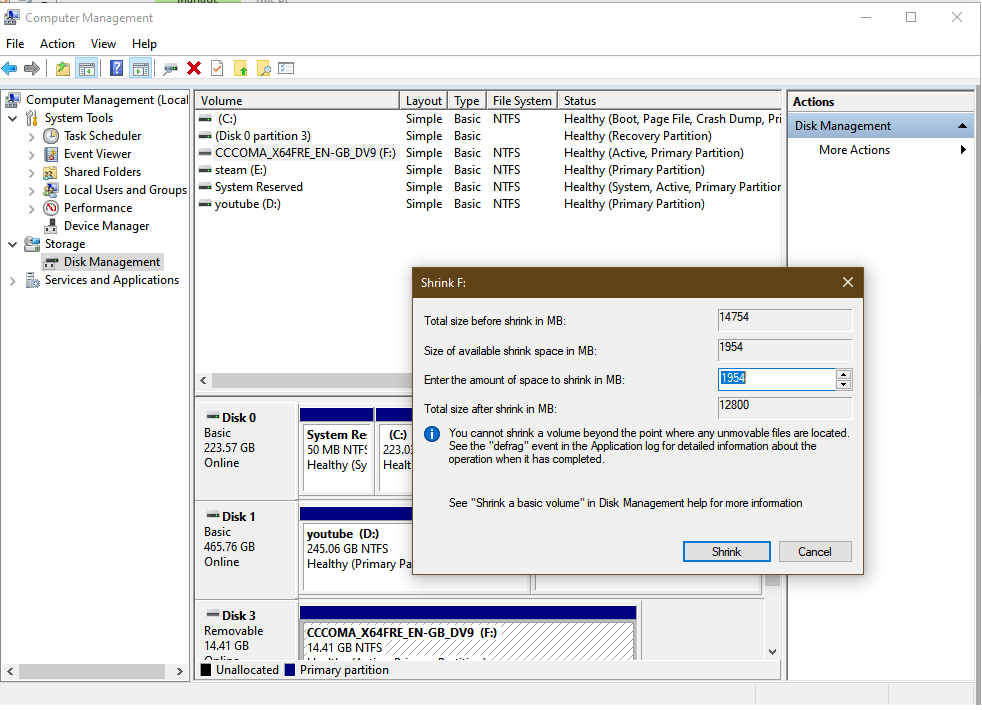
Now, you’ll be assigning the new partition space in megabytes. To assist you in accurately setting the space, we recommend using the UnitConverters tool for converting values from gigabytes to megabytes or you can see our article about Windows calculator where you can use the unit converter, In any case, input the size of the second partition in the “Enter the amount of space to shrink in MB” field. Upon completion, click the “Shrink” button below to commence extracting another section from the flash drive with the specified space.
Right-click the black-highlighted second partition of the flash drive and select New Simple Volume from the menu to initiate the formatting process. Proceed through the prompted window without modifications, clicking Next and then Finish to complete the flash drive setup. The black-highlighted portion will turn blue, indicating multiple partitions. When opening File Explorer, you’ll notice the flash drive has multiple partitions, allowing easy file storage without complications. Upon ejecting the flash drive, these partitions will be hidden, ensuring normal usage.
👉What about the SD Card life span?
To revert to a single partition, empty the flash drive, reopen Disk Management, right-click on each partition, and choose Delete Volume. Merge the sizes of the deleted partitions, right-click on the resulting black-highlighted section, select New Simple Volume, and go through Next to Finish, completing the flash drive setup with a single usable partition.
2. Using storage partitioning software.
If you wish to partition your flash drive into multiple segments without the need for formatting or deleting stored files, this can be achieved through specialized external programs designed for storage unit management. These tools employ unique technologies that facilitate extensive modifications to the storage unit without requiring content evacuation.
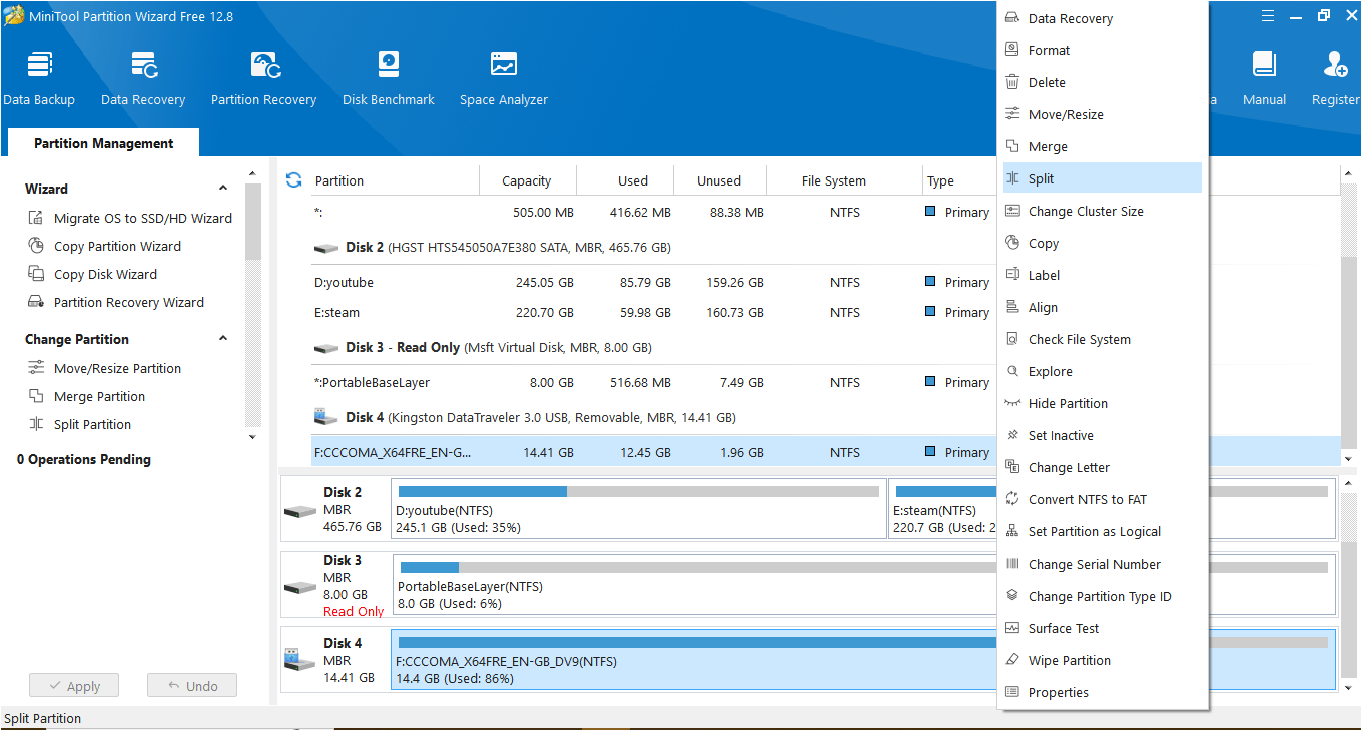
For this explanation, we have utilized the MiniTool Partition Wizard, specifically its portable version. You can use it if you aim to leverage the program solely for this task. After launching the program, simply right-click on the flash memory partition in the lower section, then select the “Split Partition” option from the menu.
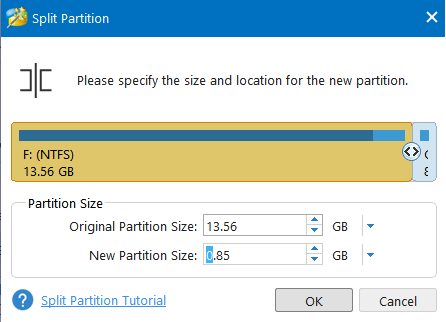
In the “Split Partition” window that appears, you’ll notice that the MiniTool Partition Wizard automatically divides the flash drive’s primary partition into two, setting the size of the second partition equal to the first. However, you also have the option to manually adjust partition sizes by sliding the scroll bar left or right. Once done, press OK. Upon completion, you will have operation information where what will happen if everything is ok click Apply on the toolbar and confirm the operation if prompted by a pop-up message.
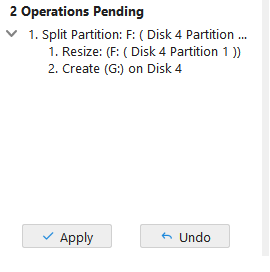
then after you click apply the program starts resizing your partition and adding the new partition size that you are selected.
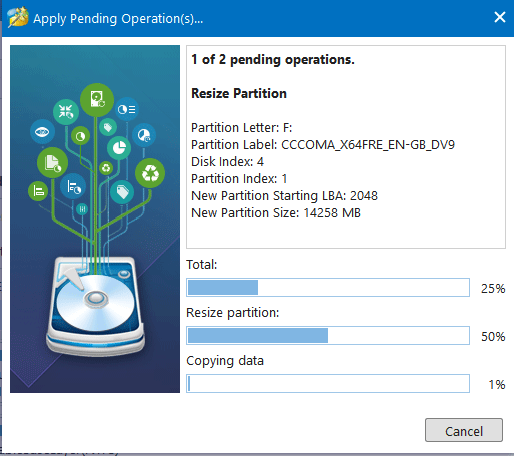
Instantly, the flash memory undergoes a partitioning process, dividing it into two sections. The duration of this process depends on the flash drive’s speed and the size of the stored files. Upon completion, you’ll observe that files are still stored seamlessly between the partitions.
Finally, I hope my article added some valuable information to you. If you have some questions? Let me know in the comments below. I’ll try my best to answer them.


